

Well, it is turkey hunting season around here. We have talked about the idea of hunting a wild turkey, and have never gotten around to being prepared to do so. But, last week, my son and husband set out for our property with the plan to bring a turkey home for the pot.
Before they left to go turkey hunting, my son warmed up his target practice and came back in to show me his target.
I told him if he keeps that up, the turkey won't have a chance!
And I was right! They weren't gone long, maybe 15 minutes, when I got a text from my husband with a picture of my son holding up his turkey. Wow! Upon driving up to our land, there the turkeys were. My son stepped out of the car, took aim, and hit his mark. They told me to get ready for the processing, as they were on their way home.
So, like the good wife that I am, I put a large pot of water on to boil, and mentally prepared myself for the adventure ahead.
WARNING: Somewhat graphic pictures below!
Our son was pretty proud of his accomplishment, but the real work was just ahead of us.

First job was to cut off the wings, as there wasn't much but feathers there.

Annie hovered around us, keeping a close eye on everything.
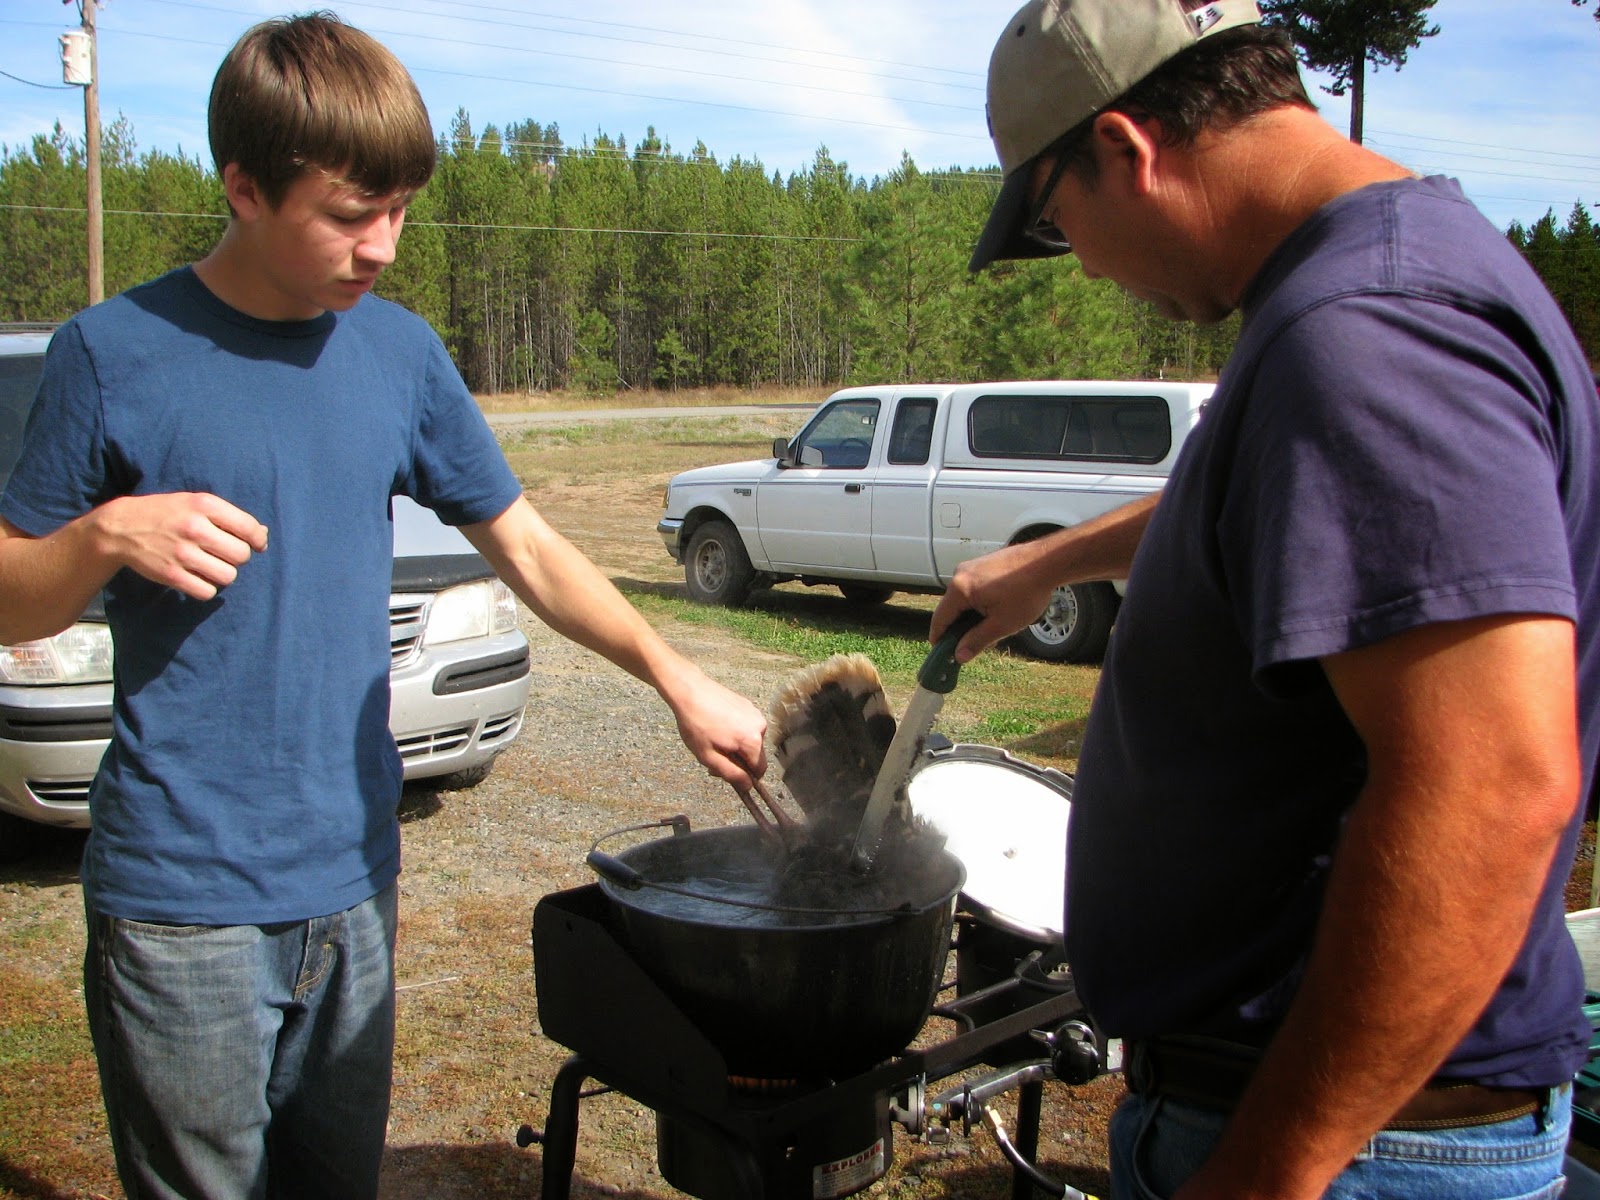
Then it was time to dip the turkey into the pot of boiling water to soften the feathers so they could be removed.

The large feathers came off really easily. It was the smaller feathers that took the longest.
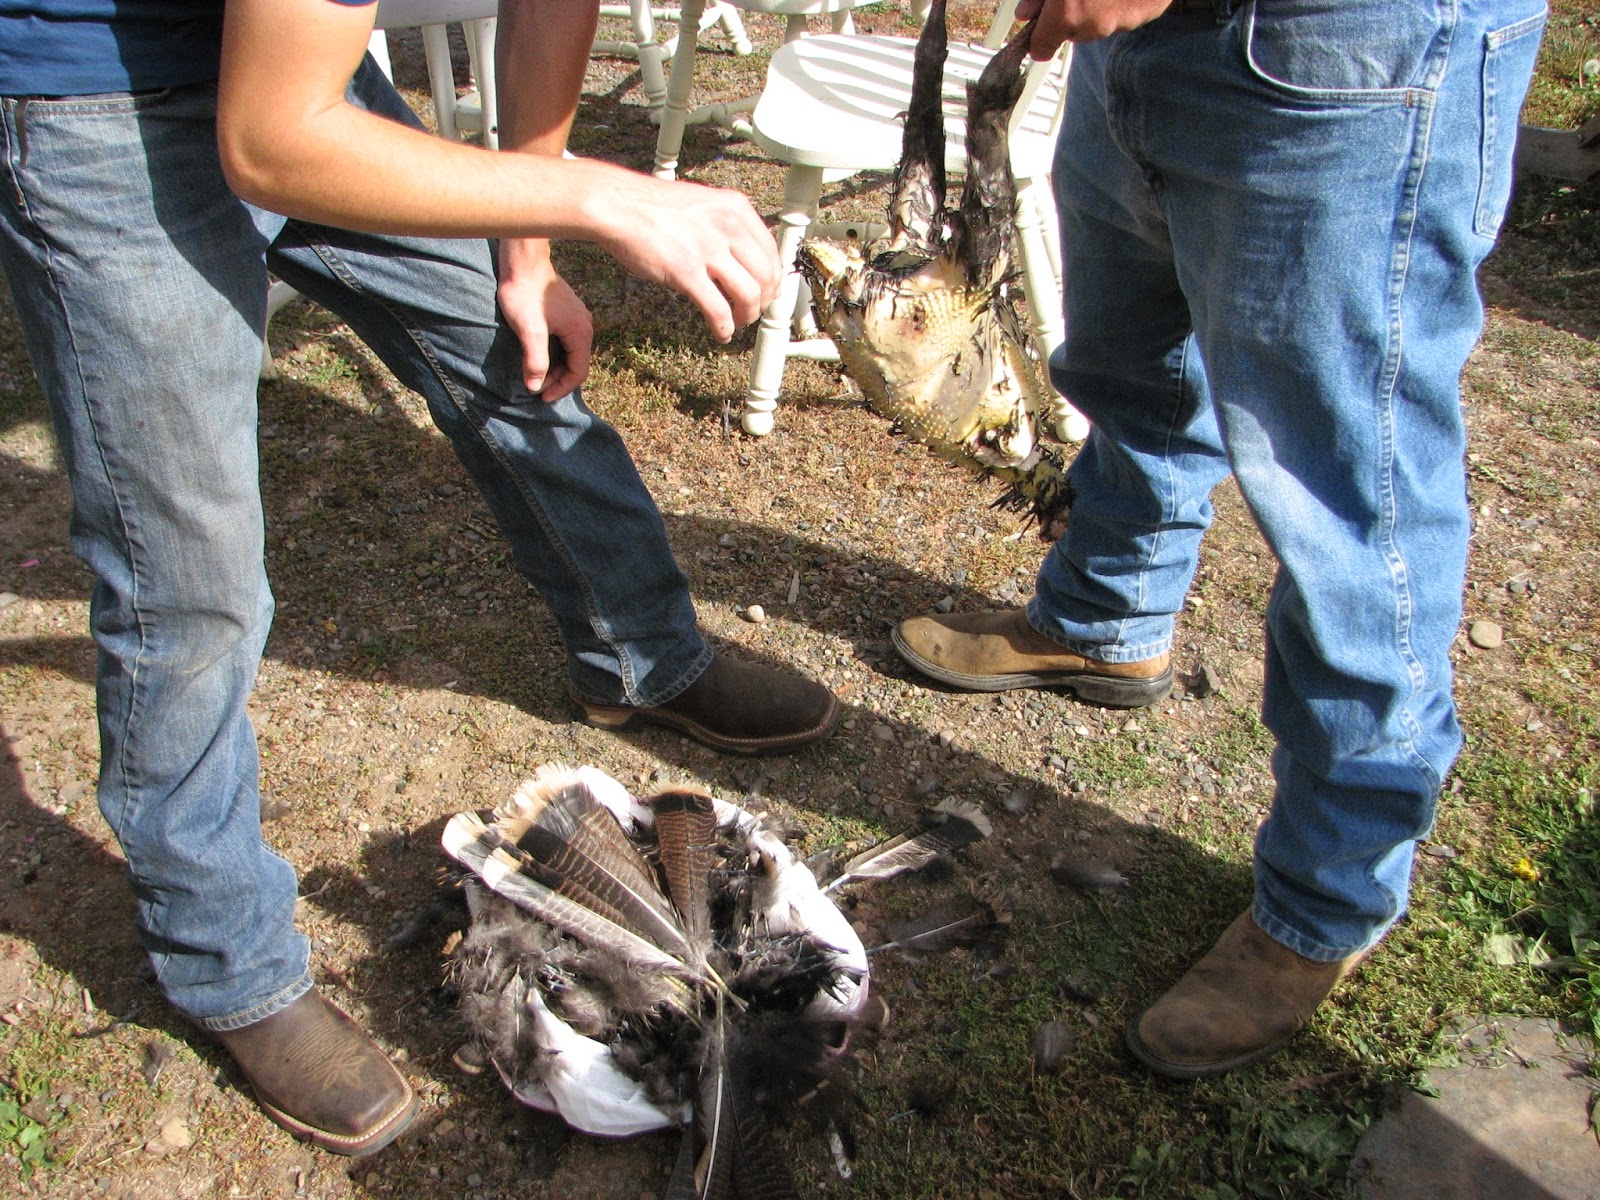
Both my son and I pulled feathers while my husband held the turkey.


Here we have the turkey just about de-feathered. It had taken us about 20 minutes to get to this point.

Annie never took her eye off the bird. She stayed close by, carefully watching everything! The next part, which I did not take any pictures of, was cutting open the carcass, and gutting it. That was a pretty messy job. Since the shot hit the turkey in one breast, we lost about half the breast. We realized that this turkey, although she looked big with all her feathers, once de-feathered, she was very tiny, maybe about 10 pounds, if that. There wasn't any meat to speak of on the legs!
Because there wasn't much left to cook, and because one part of the breast had to be discarded, we decided that the crock pot was the best way to get the most of the meat left on the bones, and I would save the breast to be eaten later.

I put the turkey in the crock pot, along with some other vegetables, and a bay leaf, and some salt, and let it cook slowly for a day or so. Because my husband had to leave for work, we decided to freeze the broth and breast meat, and wait until he returned home to make the meat into a meal.

So here it is... the turkey in the pot! This is all of the meat that we got out of the turkey. About 1-1/2 of the breast.

I added some butter, and seasoning, and roasted the turkey breast in the pan just until it was lightly browned. Then I added some of the turkey broth to the pan to deglaze the fat and juices.

Then I added in a jar of my homemade cream of mushroom soup.

And the rest of my carrots from my garden. These were the wee-ones that I didn't want to put in the dehydrator, and had saved them just for this meal.

And I added some Mrs. Dash seasoning, and my own dehydrated sage leaves and thyme - just a couple of leaves of sage, and a couple of twigs of thyme.

Mixed it all together... and let it simmer away for an hour or so. The house began to smell heavenly!

After simmering for an hour or so, the breasts had softened and there was a nice gravy that had formed. I gently tore the meat with two forks.

I cooked up some homemade mashed potatoes, and corn, along with homemade sourdough bread, and served up the turkey for dinner. As we sat down to enjoy the meal, all of us were amazed at the fact that the turkey did not taste "wild" at all! It simply was absolutely divinely delicious! All plates were just about licked clean, and even Annie didn't get any scraps from it!
After devouring the delicious meal that the turkey provided, my son decided that perhaps turkeys aren't "that much work" cleaning after all, and thinks he or my husband may try for another one. I agreed. I was amazed at how wonderful the turkey breast tasted, without any "wild" flavor at all. It was good enough to serve up for Thanksgiving day!
So, now you know that wild turkey can be delicious! I have heard differing reports on how to cook wild turkey, and I was more than a little concerned that my efforts at cooking the turkey would be in vain, but we were all hugely surprised at how wonderful this turkey tasted, in fact, so much so, that my daughter may try her hand next at one... I'll keep you posted on that!
Before they left to go turkey hunting, my son warmed up his target practice and came back in to show me his target.
I told him if he keeps that up, the turkey won't have a chance!
And I was right! They weren't gone long, maybe 15 minutes, when I got a text from my husband with a picture of my son holding up his turkey. Wow! Upon driving up to our land, there the turkeys were. My son stepped out of the car, took aim, and hit his mark. They told me to get ready for the processing, as they were on their way home.
So, like the good wife that I am, I put a large pot of water on to boil, and mentally prepared myself for the adventure ahead.
WARNING: Somewhat graphic pictures below!
First job was to cut off the wings, as there wasn't much but feathers there.
Annie hovered around us, keeping a close eye on everything.
Then it was time to dip the turkey into the pot of boiling water to soften the feathers so they could be removed.
The large feathers came off really easily. It was the smaller feathers that took the longest.
Both my son and I pulled feathers while my husband held the turkey.
Here we have the turkey just about de-feathered. It had taken us about 20 minutes to get to this point.
Annie never took her eye off the bird. She stayed close by, carefully watching everything! The next part, which I did not take any pictures of, was cutting open the carcass, and gutting it. That was a pretty messy job. Since the shot hit the turkey in one breast, we lost about half the breast. We realized that this turkey, although she looked big with all her feathers, once de-feathered, she was very tiny, maybe about 10 pounds, if that. There wasn't any meat to speak of on the legs!
Because there wasn't much left to cook, and because one part of the breast had to be discarded, we decided that the crock pot was the best way to get the most of the meat left on the bones, and I would save the breast to be eaten later.
I put the turkey in the crock pot, along with some other vegetables, and a bay leaf, and some salt, and let it cook slowly for a day or so. Because my husband had to leave for work, we decided to freeze the broth and breast meat, and wait until he returned home to make the meat into a meal.
So here it is... the turkey in the pot! This is all of the meat that we got out of the turkey. About 1-1/2 of the breast.
I added some butter, and seasoning, and roasted the turkey breast in the pan just until it was lightly browned. Then I added some of the turkey broth to the pan to deglaze the fat and juices.
Then I added in a jar of my homemade cream of mushroom soup.
And the rest of my carrots from my garden. These were the wee-ones that I didn't want to put in the dehydrator, and had saved them just for this meal.
And I added some Mrs. Dash seasoning, and my own dehydrated sage leaves and thyme - just a couple of leaves of sage, and a couple of twigs of thyme.
Mixed it all together... and let it simmer away for an hour or so. The house began to smell heavenly!
After simmering for an hour or so, the breasts had softened and there was a nice gravy that had formed. I gently tore the meat with two forks.
I cooked up some homemade mashed potatoes, and corn, along with homemade sourdough bread, and served up the turkey for dinner. As we sat down to enjoy the meal, all of us were amazed at the fact that the turkey did not taste "wild" at all! It simply was absolutely divinely delicious! All plates were just about licked clean, and even Annie didn't get any scraps from it!
After devouring the delicious meal that the turkey provided, my son decided that perhaps turkeys aren't "that much work" cleaning after all, and thinks he or my husband may try for another one. I agreed. I was amazed at how wonderful the turkey breast tasted, without any "wild" flavor at all. It was good enough to serve up for Thanksgiving day!
So, now you know that wild turkey can be delicious! I have heard differing reports on how to cook wild turkey, and I was more than a little concerned that my efforts at cooking the turkey would be in vain, but we were all hugely surprised at how wonderful this turkey tasted, in fact, so much so, that my daughter may try her hand next at one... I'll keep you posted on that!

In my efforts to clean out the freezer, I have discovered that within the hidden places of my freezer exist possibilities for cheap dog food! LOL. Imagine that!
Well, we all know that sometimes things go into the freezer with the best of intentions, but somehow get forgotten behind, or underneath all the packages that go into the freezer with anticipation of being used at a later date.
Well, our freezer is no different. Actually, I should say that we have 3 freezers. We have two refrigerators (one upstairs, and one downstairs), and one upright freezer. The reason we have two refrigerators is because we are renting, and our personal refrigerator would not fit into the space designed for it in the kitchen. So, we are using the refrigerator that was here when we moved in, and are keeping our own refrigerator downstairs, as well as our upright freezer. This means that I tend to stock up on freezer items, because I know I have lots of space... right? Well, the problem with that is that sometimes it is easy to forget what you have and to stock up on things you really don't need.
So, in my anticipation of the upcoming hunting season, I knew that my freezers needed attention. I began dehydrating some of the frozen bags of vegetables that can be stored indefinitely in jars, and used as needed, freeing up quite a bit of space in the freezer. Then, while rummaging through the freezers, I found old packages of meat that had gotten freezer burnt. This meat is still good, but not the best quality. I have decided to cook this meat in my crock-pot along with some vegetables that have also gotten freezer burnt, and turn this into cheap dog food.
I have been cooking up this freezer burnt meat and veggies in the crock-pot, cooling it, and feeding it to Annie, our Husky-German Shepherd mix. Annie is a smart girl, she pays attention to her food sources... so now when I get out the crock-pot, she gets so excited, sniffs it, and just sits there looking at it expectantly. She doesn't understand that it takes a while to cook her food, and expects it should be ready as soon as I get the crock-pot out, lol.
Sniffing the pot...

Barking now... WHERE IS MY FOOD?

No patience at all... she expects to get things now! LOL!

In the pot is a pack of leftovers from our deer last season that was a mixture of gristle, bone, fat and some meat. I also threw in some freezer-burnt veggies as well, salted it down nicely, and put the lid on to cook for about 12 hours or so.

Because Annie couldn't understand that what was going into the pot would be ready for her to eat for a day or so, I had some "dog food" from earlier that I served up to her.

As you can see, the paper plate was licked clean, as well as the floor all around it! You've never seen a happier dog after a meal like this!
In reality, this has been a very good experience for us, and I intend to keep making dog food for Annie like this. We always save all the bones, gristle, and fat from any venison we kill, and freeze it.
Recently, while at the local grocery store, Mitchell's, I noticed that the butchers also package up the leftovers from the meat that they package, and sell it. It is sold for a fairly reasonable price, and would certainly be far better and more nutritious for your dogs than much of what they get that is called dog food. I've noticed that Annie hardly eats her dog food any more - I would say she is eating about half of what she had been eating, and maybe even less than that. So, this has definitely been a big savings for us. After all dog food is not cheap, and even more, it is usually chock full of additives and GMO food that can't be good for them either.
So, if you don't have access to freezer burnt meat, or vegetables (hooray for you!), then you can also go to your local grocer or butcher, and see if you can get leftover meat bones to cook down in your crock-pot for your dogs. They will love you for it!!!
Well, we all know that sometimes things go into the freezer with the best of intentions, but somehow get forgotten behind, or underneath all the packages that go into the freezer with anticipation of being used at a later date.
Well, our freezer is no different. Actually, I should say that we have 3 freezers. We have two refrigerators (one upstairs, and one downstairs), and one upright freezer. The reason we have two refrigerators is because we are renting, and our personal refrigerator would not fit into the space designed for it in the kitchen. So, we are using the refrigerator that was here when we moved in, and are keeping our own refrigerator downstairs, as well as our upright freezer. This means that I tend to stock up on freezer items, because I know I have lots of space... right? Well, the problem with that is that sometimes it is easy to forget what you have and to stock up on things you really don't need.
So, in my anticipation of the upcoming hunting season, I knew that my freezers needed attention. I began dehydrating some of the frozen bags of vegetables that can be stored indefinitely in jars, and used as needed, freeing up quite a bit of space in the freezer. Then, while rummaging through the freezers, I found old packages of meat that had gotten freezer burnt. This meat is still good, but not the best quality. I have decided to cook this meat in my crock-pot along with some vegetables that have also gotten freezer burnt, and turn this into cheap dog food.
I have been cooking up this freezer burnt meat and veggies in the crock-pot, cooling it, and feeding it to Annie, our Husky-German Shepherd mix. Annie is a smart girl, she pays attention to her food sources... so now when I get out the crock-pot, she gets so excited, sniffs it, and just sits there looking at it expectantly. She doesn't understand that it takes a while to cook her food, and expects it should be ready as soon as I get the crock-pot out, lol.
Sniffing the pot...
Barking now... WHERE IS MY FOOD?
No patience at all... she expects to get things now! LOL!
In the pot is a pack of leftovers from our deer last season that was a mixture of gristle, bone, fat and some meat. I also threw in some freezer-burnt veggies as well, salted it down nicely, and put the lid on to cook for about 12 hours or so.
Because Annie couldn't understand that what was going into the pot would be ready for her to eat for a day or so, I had some "dog food" from earlier that I served up to her.
As you can see, the paper plate was licked clean, as well as the floor all around it! You've never seen a happier dog after a meal like this!
In reality, this has been a very good experience for us, and I intend to keep making dog food for Annie like this. We always save all the bones, gristle, and fat from any venison we kill, and freeze it.
Recently, while at the local grocery store, Mitchell's, I noticed that the butchers also package up the leftovers from the meat that they package, and sell it. It is sold for a fairly reasonable price, and would certainly be far better and more nutritious for your dogs than much of what they get that is called dog food. I've noticed that Annie hardly eats her dog food any more - I would say she is eating about half of what she had been eating, and maybe even less than that. So, this has definitely been a big savings for us. After all dog food is not cheap, and even more, it is usually chock full of additives and GMO food that can't be good for them either.
So, if you don't have access to freezer burnt meat, or vegetables (hooray for you!), then you can also go to your local grocer or butcher, and see if you can get leftover meat bones to cook down in your crock-pot for your dogs. They will love you for it!!!

I received a dehydrator last year for my birthday, and used it mainly last year to preserve the herbs from my garden. I still have a ton of herbs in my pantry that I dehydrated, and still use from last year! So, this year I didn't plant many herbs, and decided instead to use my dehydrator to dry fruit and vegetables. I have kept my dehydrator humming the last few days with various different fruits and vegetables. It is amazing what a great space saver a dehydrator is, as it will take a bag of frozen veggies, and after dehydration, they can fit into a pint sized jar - pretty incredible.
Bananas taste wonderful after being dehydrated. My husband loves bananas, but can't carry bananas with him while on the road, as they go bad quickly. So dehydrating the bananas makes it much easier for him to munch on a healthy snack as he is traveling.
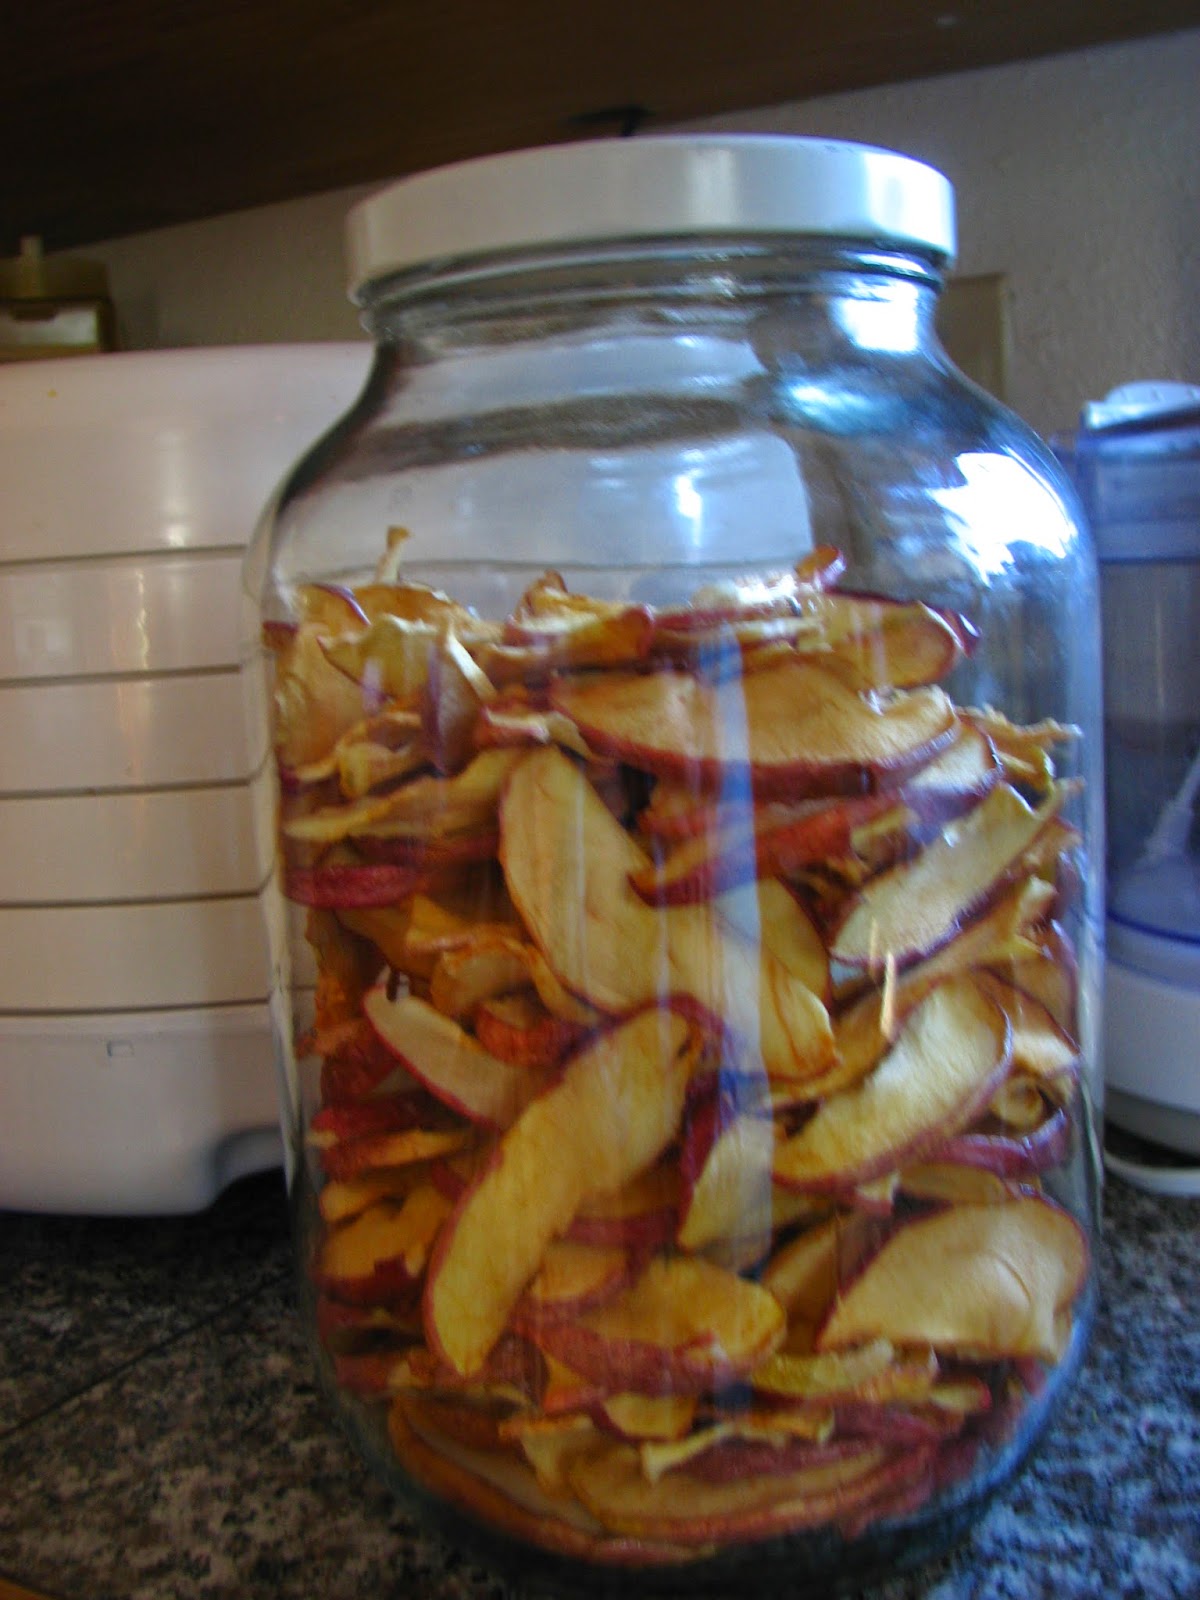
Another favorite dehydrated snack is apples. They taste incredibly sweet, and slightly chewy, and again make an excellent snack for when you don't want to pack a whole apple, you can just take 8 of these slices, and there is the whole goodness of an apple in a little baggie!

I have also been experimenting with soaking wheat and then dehydrating it. This breaks down the hard shell of the wheat into a more digestible form. Then, I will take the dried wheat, and grind it into fresh flour to make homemade bread.

This pint-sized jar holds 2 bags of frozen veggies! There is one bag of frozen peas, and one bag of mixed vegetables. I just took the frozen veggies, put them on the dehydrator trays, and dehydrated them, and then popped them into the jar for storage. We are trying to free up space in our freezer for the venison that we hope to fill the freezer with this fall! This is a great space saver, and preserver!

This is a whole package of frozen broccoli, again dehydrated and fit into a pint sized jar - amazing. It is better to store dehydrated food in jars, as they will last longer, as ziplock baggies allow some air into the package. Another option (which I haven't tried yet) is to place them in Food Saver vacuum bags.

Another great way to save all that zucchini and squash that mass produce in your garden - dehydrating it preserves it, and you can eat this zucchini right out of the jar, it is so sweet and chewy - an amazing snack!

I got a good deal on all these peppers at the grocery store, and decided to hydrate them instead of keeping them in the refrigerator until they go bad (which is what usually happens, as I use a few, and the rest usually go bad). This way, I can use them as I need them. This is how the peppers look when I first put them on the tray. They are currently dehydrating as I write, so I don't have a picture of what they look like when they are done.... yet :)
One question I always wondered about was how to go about re-hydrating the food you have hydrated. Hydrating vegetables is very easy - you can either pour some boiling water over them to re-hydrate, or cook them in a soup or stew, allowing for extra liquid to be absorbed by the veggies. You can also do the same for fruit. I picked up a book at the library called "The Dehydrator Bible" (here it is on amazon). This book has a huge amount of great tips on how to dehydrate, and then also tons of recipes to use your dehydrated foods in. The manual that came with my dehydrator is also very helpful in determining how to prepare vegetables, fruit, and herbs to be dried, how long to dry them, and also how long to store them.
Dehydrating is a great way to space save on your veggies and fruits that take up a lot of room in your freezer, or cupboards after being canned. Since we have great anticipation for the upcoming hunting season, I am working away at my freezer, trying to hydrate things that can be hydrated, to make space for meat. It is definitely a work in progress!
Bananas taste wonderful after being dehydrated. My husband loves bananas, but can't carry bananas with him while on the road, as they go bad quickly. So dehydrating the bananas makes it much easier for him to munch on a healthy snack as he is traveling.
Another favorite dehydrated snack is apples. They taste incredibly sweet, and slightly chewy, and again make an excellent snack for when you don't want to pack a whole apple, you can just take 8 of these slices, and there is the whole goodness of an apple in a little baggie!
I have also been experimenting with soaking wheat and then dehydrating it. This breaks down the hard shell of the wheat into a more digestible form. Then, I will take the dried wheat, and grind it into fresh flour to make homemade bread.
This pint-sized jar holds 2 bags of frozen veggies! There is one bag of frozen peas, and one bag of mixed vegetables. I just took the frozen veggies, put them on the dehydrator trays, and dehydrated them, and then popped them into the jar for storage. We are trying to free up space in our freezer for the venison that we hope to fill the freezer with this fall! This is a great space saver, and preserver!
This is a whole package of frozen broccoli, again dehydrated and fit into a pint sized jar - amazing. It is better to store dehydrated food in jars, as they will last longer, as ziplock baggies allow some air into the package. Another option (which I haven't tried yet) is to place them in Food Saver vacuum bags.
Another great way to save all that zucchini and squash that mass produce in your garden - dehydrating it preserves it, and you can eat this zucchini right out of the jar, it is so sweet and chewy - an amazing snack!
I got a good deal on all these peppers at the grocery store, and decided to hydrate them instead of keeping them in the refrigerator until they go bad (which is what usually happens, as I use a few, and the rest usually go bad). This way, I can use them as I need them. This is how the peppers look when I first put them on the tray. They are currently dehydrating as I write, so I don't have a picture of what they look like when they are done.... yet :)
One question I always wondered about was how to go about re-hydrating the food you have hydrated. Hydrating vegetables is very easy - you can either pour some boiling water over them to re-hydrate, or cook them in a soup or stew, allowing for extra liquid to be absorbed by the veggies. You can also do the same for fruit. I picked up a book at the library called "The Dehydrator Bible" (here it is on amazon). This book has a huge amount of great tips on how to dehydrate, and then also tons of recipes to use your dehydrated foods in. The manual that came with my dehydrator is also very helpful in determining how to prepare vegetables, fruit, and herbs to be dried, how long to dry them, and also how long to store them.
Dehydrating is a great way to space save on your veggies and fruits that take up a lot of room in your freezer, or cupboards after being canned. Since we have great anticipation for the upcoming hunting season, I am working away at my freezer, trying to hydrate things that can be hydrated, to make space for meat. It is definitely a work in progress!

I was looking back through my blog posts, and realized that I hadn't introduced our "girls" to this blog yet, and now seems like a great time!
Our son had done some work for a local neighbor this past summer, and she had some chickens that needed a home, and so one day my son showed up at the house with these six lovely ladies! Luckily, we had a chicken coop that was on the property already, and it was perfect for them.
Even though our son brought the chickens home, our daughter, however, has turned out to be the one who really fell in love with "the girls", while our son stops by to see them every once in a while.

At first they were very skittish, and didn't like to be held or touched at all.

The most important thing to them was that they had enough food and water.

If you tried to approach them, they would run for their coop, so we knew that this had to change.

They were six pretty girls, but they all looked almost identical. One of them has a small ring of light gold around her neck, but other than that, they all look almost identical.

But their personalities make them stand out. This one is very friendly and outgoing, and will be the first one to come out of the coop when you bring food.


So, we began experimenting with different things to teach them that we loved them, and wanted to be friends. I began putting pieces of bread in a bowl with oatmeal and some milk.

Wow! Things really started to turn around! We discovered that they really love bread and milk!

Now, when we come to the coop to feed them, they hustle and bustle out the door to get to the bowl first.

It doesn't take them long to finish off this bowl of bread, oatmeal, and milk.

Their favorite thing to do is to grab a piece of bread out of the bowl and drop it in the dirt and mud, and then eat it. Silly chickens! But, I guess they do need the dirt and stones to help their gizzards digest their food.


This little hen was guarding her piece of bread like a hawk, because some of the others liked to come around and steal her bread.
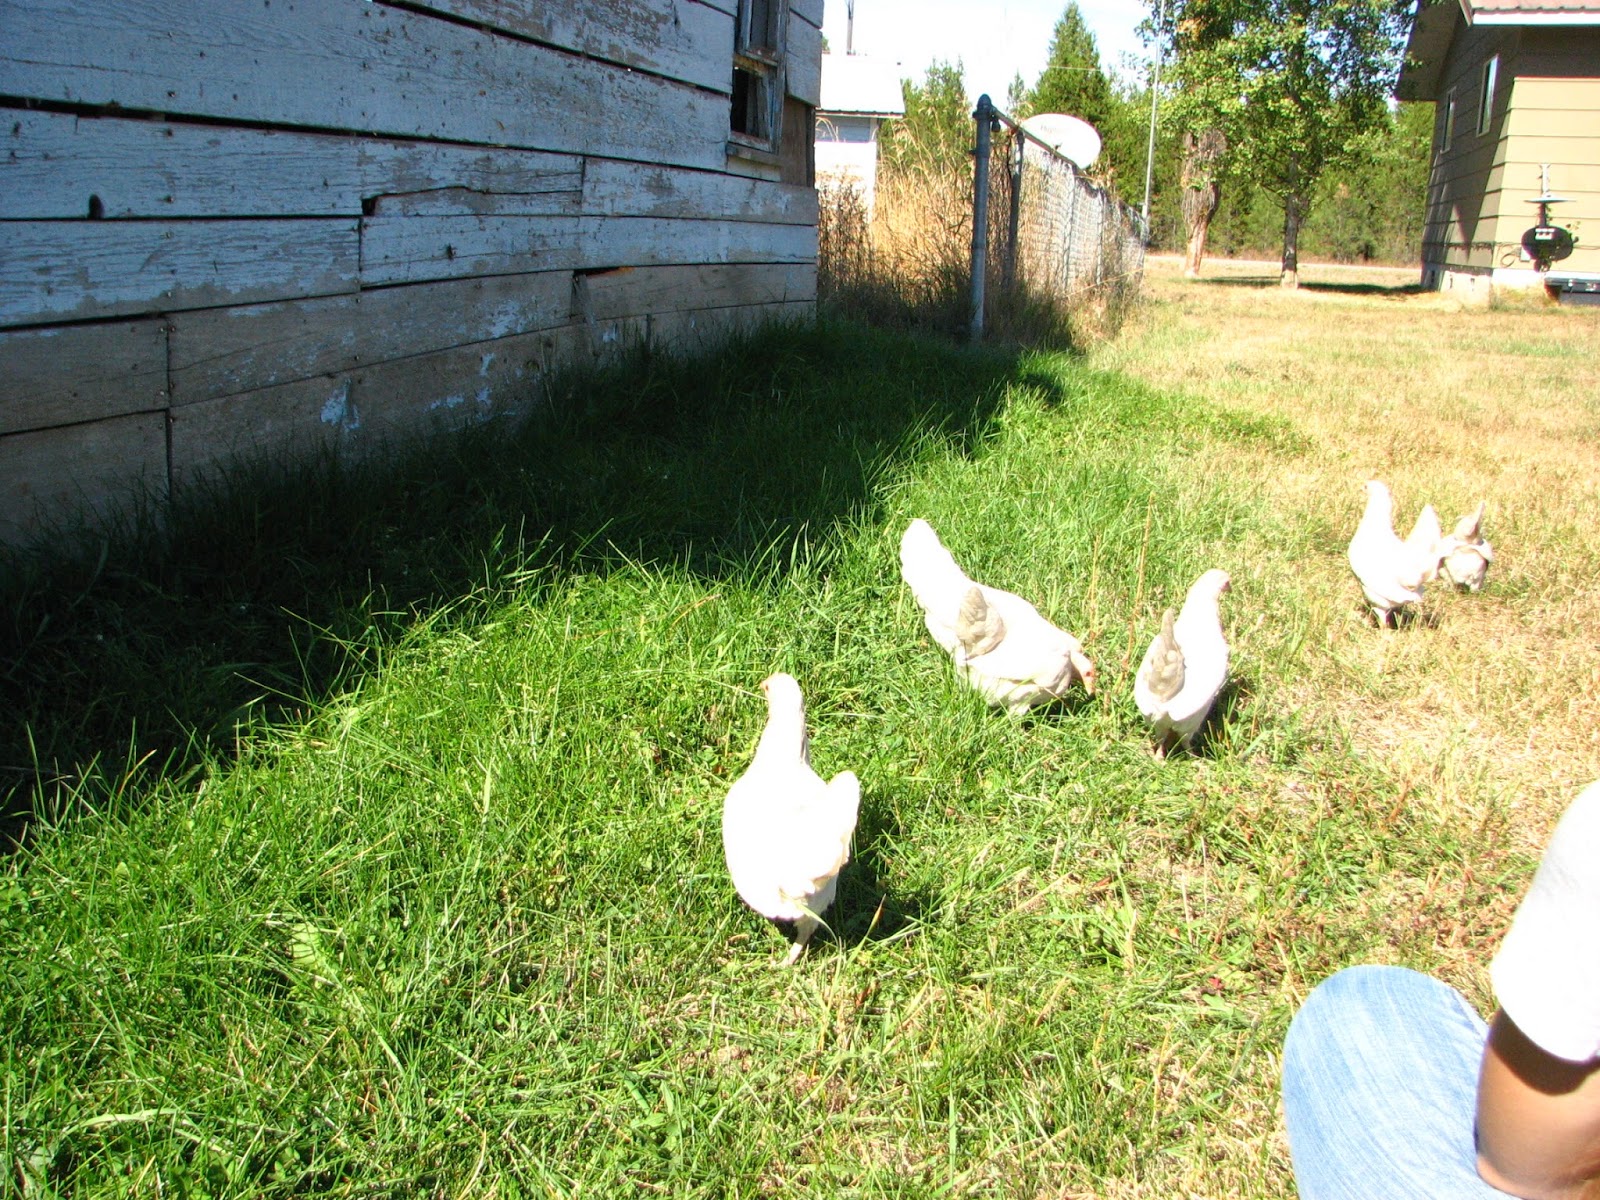
So we have begun taking them out of the coop into our backyard. The grasshoppers have just taken over right now, and the hens had a heyday chasing after the grasshoppers!

It was funny how they would run around after a grasshopper, but yet still be very skittish and so aware of their surroundings, that if anything (such as a car driving by) scared them, they would run into their little group.

Such pretty little things they are!

Having fun chasing after grasshoppers - yeah! KILL IT! One less grasshopper in our yard!

They are a lot of fun to watch, and you can begin to tell them apart by their personalities.

There are two hens who really aren't scared of much. There are two others that are cautious, but not overly afraid. Then there are two who really are timid chickens, and run for the coop if you move a little too fast, or if something just scares them.

It has been a lot of fun getting used to having chickens. I find myself looking forward to visiting with them every day, and talking to them, and petting them. The biggest event I can't wait for is when they begin to lay eggs. I am not sure just exactly how old they are, or what kind of breed they are. I believe my son was told they were a mix of two different kinds of hens. At any rate, I hope that they become good egg layers, because we love us some good home grown eggs! You can be sure I will blog about the egg laying event when it finally takes place!!!
Our son had done some work for a local neighbor this past summer, and she had some chickens that needed a home, and so one day my son showed up at the house with these six lovely ladies! Luckily, we had a chicken coop that was on the property already, and it was perfect for them.
Even though our son brought the chickens home, our daughter, however, has turned out to be the one who really fell in love with "the girls", while our son stops by to see them every once in a while.
At first they were very skittish, and didn't like to be held or touched at all.
The most important thing to them was that they had enough food and water.
If you tried to approach them, they would run for their coop, so we knew that this had to change.
They were six pretty girls, but they all looked almost identical. One of them has a small ring of light gold around her neck, but other than that, they all look almost identical.
But their personalities make them stand out. This one is very friendly and outgoing, and will be the first one to come out of the coop when you bring food.
So, we began experimenting with different things to teach them that we loved them, and wanted to be friends. I began putting pieces of bread in a bowl with oatmeal and some milk.
Wow! Things really started to turn around! We discovered that they really love bread and milk!
Now, when we come to the coop to feed them, they hustle and bustle out the door to get to the bowl first.
It doesn't take them long to finish off this bowl of bread, oatmeal, and milk.
Their favorite thing to do is to grab a piece of bread out of the bowl and drop it in the dirt and mud, and then eat it. Silly chickens! But, I guess they do need the dirt and stones to help their gizzards digest their food.
This little hen was guarding her piece of bread like a hawk, because some of the others liked to come around and steal her bread.
So we have begun taking them out of the coop into our backyard. The grasshoppers have just taken over right now, and the hens had a heyday chasing after the grasshoppers!
It was funny how they would run around after a grasshopper, but yet still be very skittish and so aware of their surroundings, that if anything (such as a car driving by) scared them, they would run into their little group.
Such pretty little things they are!
Having fun chasing after grasshoppers - yeah! KILL IT! One less grasshopper in our yard!
They are a lot of fun to watch, and you can begin to tell them apart by their personalities.
There are two hens who really aren't scared of much. There are two others that are cautious, but not overly afraid. Then there are two who really are timid chickens, and run for the coop if you move a little too fast, or if something just scares them.
It has been a lot of fun getting used to having chickens. I find myself looking forward to visiting with them every day, and talking to them, and petting them. The biggest event I can't wait for is when they begin to lay eggs. I am not sure just exactly how old they are, or what kind of breed they are. I believe my son was told they were a mix of two different kinds of hens. At any rate, I hope that they become good egg layers, because we love us some good home grown eggs! You can be sure I will blog about the egg laying event when it finally takes place!!!
Subscribe to:
Posts (Atom)


.jpeg)





Social Icons